After that pun-derful start, you probably want a brilliantly written blog post to make up for the groans. Well, apologies in advance; it simply isn’t going to happen.
That’s right: we aren’t hedging our bets.
So this post follows on from yesterday’s one, where we showed you some wacky, zany, and even just bloody wonderful pics of the sort of things that creative people can do when they get their hands on
According to the New Zealand Institute of Horticulture, “Topiary is all about time and patience, and is by no means a brutal process”. Creating wonderful works of art in hedges and shrubs isn’t just a matter of buying a hedge and hacking it to pieces…unless your intended effect is a small pile of leaves.
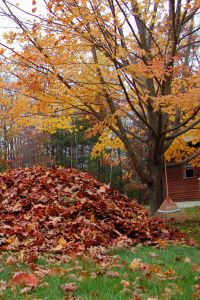
For reference purposes, this is a small pile of leaves.
The first thing to keep in mind is that you should know your intended effect before you start. Simple shapes are best to begin with; as fantastic as an image like this awesome giraffe shrub may be, Rome wasn’t built in a day. And, eh, nor were hedges in the shape of giraffes. That analogy sort of fell apart. Just like your hedge shouldn’t!
You’re going to need secateurs, and as many different types of shears as you can lay your mitts on. A long handled pair and a pair of topiary shears will come in handy. ‘Handy’ isn’t a pun, but sort of feels like it should be?
You can start off freehand, cutting the hedge carefully in the approximate shape that you’d like it to end up. But when it comes to fine tuning, you’re going to find employing a few guides to help you along the way really comes in handy. A loop of wire is a good way to get a circle shape; you can slowly lower the circle over your hedge, and trim off anything which protrudes beyond the edges. Hanging baskets can be used similarly for creating domed surfaces. Just drop the hanging basket upside-down onto your shrub like a hat, and cut off anything which pokes through the holes.
To cut a cone, work slowly from the top down. You can stretch a piece of string from the cone’s apex, and use this as a guideline. If your cone looks a bit patchy to begin with, don’t despair; the plant will thicken out in time.
When doing anything more complex, if you have a shrub which grows densely enough – Coprosma is a great choice – you can ‘sketch’ with your shears first, before beginning the final cuts. This works well for difficult lines like spirals and swirls.
Above all, like so many things, the key is practice and patience. Nobody gets it right the first time!